Vinyl plank flooring is a popular alternative to traditional hardwood floors that’s designed with the average homeowner in mind. This means that it’s fairly simple to install and requires very little in the way of skill or experience. The following guide will walk you through the necessary steps for a simple and fast installation process that can give you the best results.
Prep The Floor
The most important rule when it comes to vinyl plank flooring is that the surface has to be smooth. Rough and uneven spots, staples, and protruding nails will poke through the new flooring, creating noticeable high bumps that will be uncomfortable to the touch and will wear faster than the rest of the floor.
The quickest way to flatten the surface is by using a floor scraper, but if there are spots that are too high, you may have to use a belt sander or a floor grinder instead. This is a dusty job so after you’re done be sure to sweep the floor clean of all dirt and debris.
Plan Your Flooring Layout
Now, it’s time to set the layout for your flooring. Start by deciding which direction your vinyl plank flooring will run. You can set your starting point by choosing a wall that you want your planks to go off then work your way outwards. We strongly recommend that you do a test run of how and where the planks would lay. This way, you’ll have the chance to adjust your plan and avoid wasting valuable time, effort, and materials over misplaced boards later on.
Remove Trims and Casings
For an easy and clean installation, it’s usually best to remove all trims or casings that make contact with the floor. They’re usually attached with brad nails that can be easily pulled back using a pry bar. Alternatively, if you don’t wish to remove the casings, you can measure and cut the boards around them.

Cut the Planks
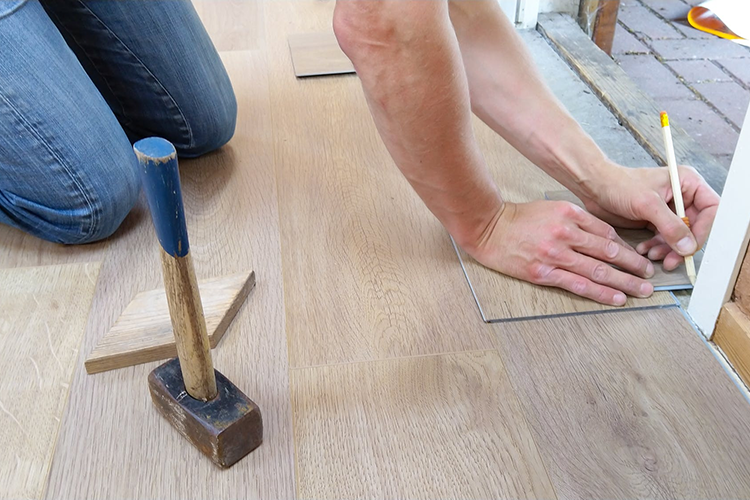
Measure the length of the plank you need, mark it with a pencil and cut it with a fine-tooth saw or a utility knife, then align the boards to run your first row of vinyl planks down the length of the first wall. Using your mark as a guide, draw a straight line on the board or just align your straight edge for each row.
Connect the Planks
Connecting the vinyl planks is very easy. You see, each plank has a locking edge that attaches side-to-side and end-to-end to its neighboring board. First, take your board and angle it upwards at 45 degrees, then place the top edge into the receiving edge of the board above it.
Get the board close to the one above it as you can before pushing it down flat. You can use a rubber mallet on the bottom edges and seams to ensure that it’s a tight fit. Now, repeat for the remaining boards.
Cut Around the Corners
If the walls have protruding edges, you’ll have to cut your boards around them. Start by marking the section that needs cutting lengthwise and widthwise and then simply make cutouts using your utility knife or table saw.
Reinstall the Trims
After cutting and fitting the planks around the protrusions, your flooring should now be complete so take a moment to appreciate your fine work! Now, it’s time to re-attach your casings and trims, preferably using an electric brad nailer and voila! You’re done.
As you can see, vinyl plank flooring is one of the easiest DIY floor coverings to install which explains its rising popularity among homeowners and DIY enthusiasts. If you’re about to install your own flooring, this guide will help you ensure that the process is as smooth and simple as possible.
Like what you see? Get it first with a subscription to ASPIRE DESIGN AND HOME Magazine.